Hello Guys, Have you had a conversation with Alexa or Cortana? These classy applications have access to defined available information to answer most of the enquiry, looking for defined available videos or music and action accordingly asked by the user.
Einstein Bots are automated chatbots that can be used for customer support or sales ennoblement process. Without interaction with any agent Einstein Bots can provide a seamless experience to customer to provide more information about your product or log any support case.
Einstein Bots has the capability of NLP (natural language processing) to understand what your customers are typing and guide with reply message on chat.
Einstein Bots with recent release have the capability to initiate an APEX Action (invocable Method), Flow and Email.
☁️ “Chatbots will power 85% of all customer service interactions by 2020.” – Gartner
💦 Why should I use them?
💡 Customers get an immediate response
💡 The Bot can answer customer questions immediately, Its reduce the number of meaningless case get logged.
💡 Since the Bot can redirect easy cases, this save time of agents to concentrate more time to work on difficult cases.
💡 It's efficiently reduce the number of agents.
💡 Bot drastically reduce the waiting time for customer to connect agent also.
💡 Bots can have personalised predefined greetings to show the importance of individual customer.
💡 Using NLP(Natural Language Processing), bots can learn how to respond to customers appropriately and give best solution.
💦What are the prerequisites to Build a Chat Bot?
Before you can start using Einstein Bots, there are a few prerequisites:
✔️ Service Cloud license and a Chat ( Live Agent ) license
✔️ Omni Channel setup (Presence configuration, Routing configuration & Service Channel for Chat Agent)
✔️ A Chat Agent Deployment
✔️ Chat button set to routing type: Omni-Channel
✔️ A Queue for your Chatbot agents
✔️ The agents must be Service Cloud users
✔️ A Snap-in Deployment to host the Einstein Bot
Once you have these prerequisites, you are ready to build Einstein Bots ! If you’ve never used Salesforce Chat (Live Agent) before, these prerequisites might seem quite scary and hard to set up. You just follow Chat (Live Agent) implementation from my previous blog post to Set up your Chat (Live Agent). Click.
So, Are you Ready? BUT... Before Creating our First Chat Bot, let’s explore some important terminology that help you to understand how to configure this BEST.
🛠️ Variables:
A developer know what is Variable, as similar as variables in Apex. For Admins, variables are used to store data, like fields in Salesforce. The bot needs variables in order to store information gathered from the customer as well as information queried from Salesforce. It can then reuse that data to present it to the customer or query more information from Salesforce. In order to populate a variable, you can ask the customer a question and store their answer, or use flows & apex (invocable methods) to get data from Salesforce. There are also some predefined context variables that the bot automatically populates at the time of its launch. One of these context variables is “ChatKey”, which automatically stores the chat key of the Live Chat Transcript that gets created as soon as the bot is launched.
🛠️ Entities:
Entities can be described as a wrapper for variables. They are like an additional data type. Salesforce provides standard ones (Boolean, Date, DateTime, Location, Money, Number, Object, Organization, Percent, Person, Text) but you can create your own custom ones too using a regex pattern or a value list. Entities are only used to validate when your customer is providing the bot with information, to stop your bot receiving “dirty” data. Let’s say when the customer provides the bot with their email address, if they type anything other than an acceptable email address, they will be asked to try again.
🛠️ Dialogs:
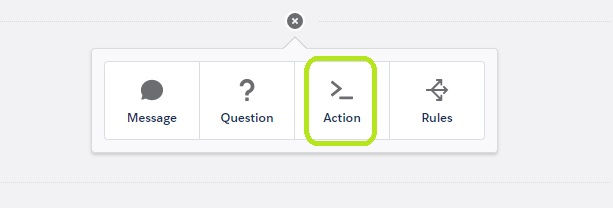
Dialogs are conversation snippets that control what your bot can do. Dialogs can be thought of like functions or methods that the bot jumps between during a chat. Each Dialog can optionally include Dialog Intents, which are phrases that your customers might use. The bot learns from Dialog Intents that you input yourself and then when it recognises one it initiates the corresponding Dialog. It’s within these Dialogs that you specify what you want the bot to do: Message, Question, Rule & Action. When the bot enters a Dialog, it will execute everything within that specific Dialog and then perform one of 4 actions at the end, one of either: ‘Wait for customer input’, ‘Show a menu’ (of Dialogs), ‘Start another Dialog’ or ‘Transfer to Agent’.
🛠️ Messages:
Messages are the most straightforward compared with others. The bot simply prints a message. Messages can also contain merge fields referencing to Variables. For example, you can merge customer’s first and last name, you can store these in Variables and then reference them in a message.
🛠️ Questions:
Questions are used to gather more information from your customer. The customer’s response will get stored in a Variable. This is where you must also select an Entity to wrap your Variable. As an email example, if you wrap your variable in the email regex pattern entity, if the customer enters anything other than a valid email address, it will be rejected and the bot will ask them to try again.
🛠️ Actions:
Actions use Flows or Apex to get/update/delete data from Salesforce. They consist of input variables and output variables. For example; you could ask the customer for their register email address and then run a Flow that finds that customer’s record from their email address and returns desire information customer looking for.
One game changer advantage of using Apex is that you can make callouts to external services using Salesforce’s REST API and store any data in the bots variables to reference later on.
💥 IF you use Apex, however, you must make sure to add the Apex class & Used Objects to the bots permission set (sfdc.chatbot.service.permset) otherwise it will not work!
🛠️ Rules:
Lastly, Rules are used to set direction to the bot down different paths into different dialogs if certain criteria are met. There are 5 rule actions:
✔️ Call Dialog – calls another Dialog, then the bot return to the original Dialog
✔️ Clear-Variable Value – clears a variable value, very useful for when your bot needs to ask a customer the same question
✔️ End Chat – To close the chat.
✔️ Redirect to Dialog – Interrupts the current dialog and redirect to another Dialog. The bot does not return to the original
✔️ Set Routing Type - Routes the chat session to a specialized queue that you define as a context variable. Use this action to transfer a session to the right agent or queue by overriding the default queue on chat buttons for Chat (Live Agent) or the channel ID for Messaging.
✔️ Set variable - Copies the contents of a context variable into a variable that you define.
✔️ Transfer to Agent – transfers the customer to an Agent using Chat.
Now Get -Set - Let’s create an Einstein Chat Bot …
⚡Step1: Enable Einstein Bots
Setup→ Feature Settings→ Service→ Service Cloud Einstein → Einstein Bot
OR
Navigate to Org Setup, and Quick find for “Einstein Bots”. Now Flip the switch to turn them on with accept all terms and conditions! Opss… It’s MAY BE deactivated again! 🤔

Now worries… 😎
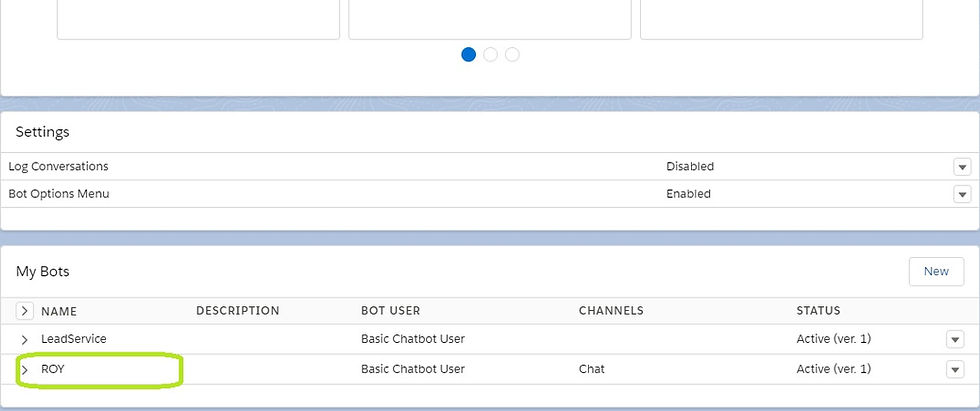
You also need to enable Chat (formerly Live Agent - this lets you relate the Einstein Bot to your Chat button) and optionally enable the Bots Options Menu over there. This gives your customers the option to manually pick dialogs or let them transfer to an agent.
Even, With Switch on the “Log Conversations” option you can log all your Einstein Bot conversations so you can debug them further and also analyse them to see how the bot is performing. It’s preferable.
💬 To Enable Chat ( Live Agent ) :
Setup → Feature Settings → Service → Chat → Chat Settings
& Make it enable by Check “Enable Chat”.

⚡ Step 2: Enable Einstein Bot Option Menu
In “Einstein Bots” Page (Setup→ Feature Settings→ Service→ Service Cloud Einstein → Einstein Bot)
You can find at middle of the page “Settings” grid. Here you find “Bot Option Menu”, That you need to “Enable” through “Edit” option and “Save”.

⚡ Step 3: Create new Bot
In “Einstein Bots” Page at bottom, you can find the option “My Bots” to create New Bot.
Click on “New” button and create new bot by following steps:
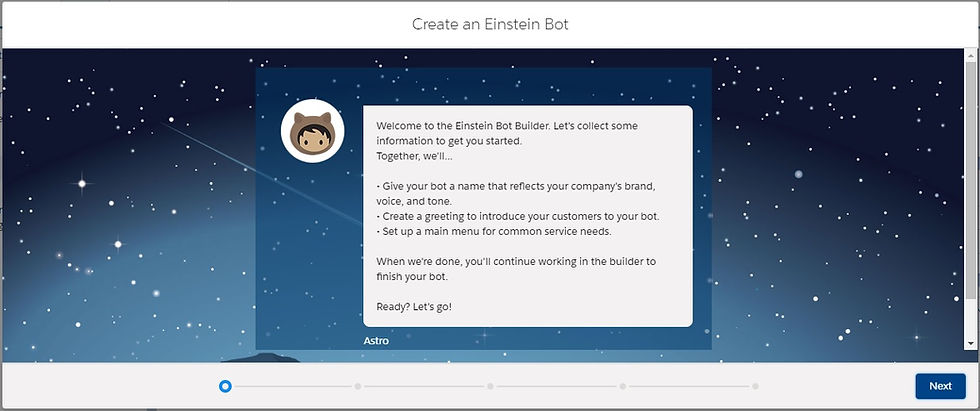
Click "Next"

Give “Einstein Bot Name & Description (optional)”, then click "Next”

Add Einstein Bot Greeting Message for your customer.

Add two or three common issues or questions from your customers and then click "Create".
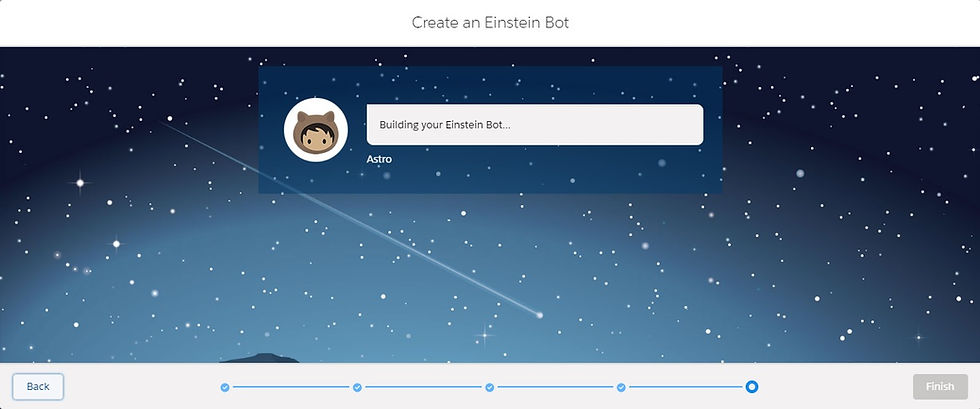
After clicking on “Finish” button, you will redirect to “Einstein Bot Builder” from where you are able to create different types of questions and messages (Dialogs) according to your business requirement. ( you can find Newly created BOT in “Einstein Bots” Page.)
⚡Step 4: Einstein Bot Builder Edit View : You can do your own configuration.
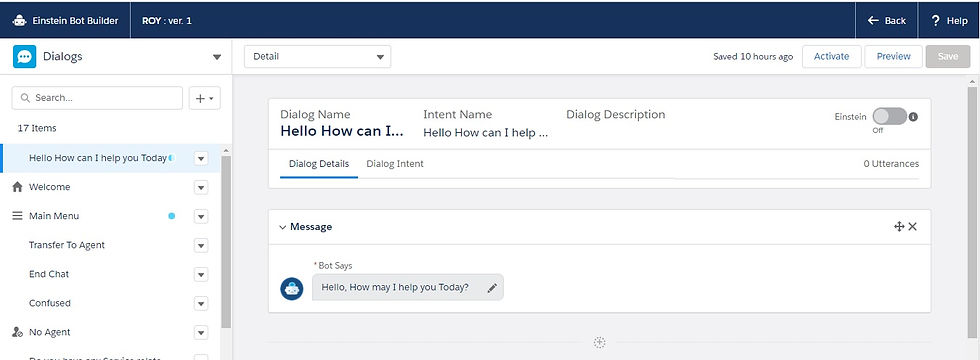
Here you find Welcome message.
Lets create some “Dialogs”
As an sample create Dialog with the name “Do you have any Service related issue?”
*API can't support any Special Characters.

☁️ Let's Create few more Dialog :
1. “Do you have any Service related issue?” - Created already
1.1 “Is it Related to ORDER?”
1.1.1 “Raise an Order Related Ticket?”
1.1.2 “Set a Call Back?”
1.2 “Is it Related to Return Item?”
2. “Do you have want to Raise a Ticket?”
2.1 “Ticket on Order Support?”
2.2 Ticket on Return Support?
AND So On ….
Lets Discuss on 2 Dialogs from here in details.
1. “Do you have any Service related issue?” :
In Dialogs you have options to use Message, Question, Action and able to Set Rule also.
In this Dialog we ignore such functionality and use the bellow (Next Step) section. Chose “Show a menu” that guide customer to response. Here we set two Dialogs (1.1 & 1.2), that we have created before.

2. Now we will discuss about another Dialog (1.1.1 Raise an Order Related Ticket?” ) that was placed within the dialog ( 1.1 “Is it Related to ORDER?”) as one of the “Show a menu” option. In this Dialog (1.1.1 “Raise an Order Related Ticket?” ) we initiate an “Acton”.

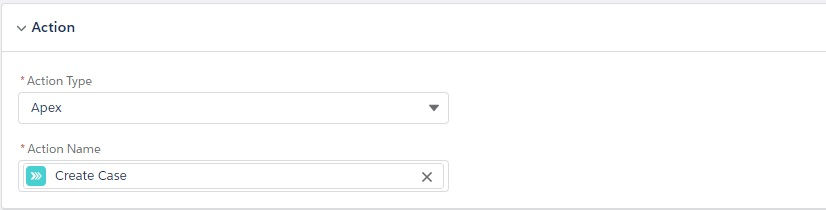
Here we refer an “Apex” class that contain an “Invocable Method” alias named “Create Case" (Discuss on next step). Action type is "Apex" and We Refer that Create case Invocable method in "Action name".
☁️ NOTE: Only invocable methods are refer in BOT)
Very basic Sample Class that contain an invocable method named (createCaseAction) label ‘Create Case’. Here I just put Account Id hard coded for quick demo purpose.

After this step, we set a message that replied by BOT to customer on chat window.

This Apex invocable method will Create an Order Related Case as Ticket automatically from Chat Bot, without any Human intervention !!!
⚡ Step 5: Setup the “Snap-ins”:
Setup→Feature Setting→Service→ Embedded Service (Formerly Snap-ins) → Embedded Service Deployment
Click on “New Deployment” Right Top corner of the Form.

Now need to Setup “New Snap in deployment”.

Put the Deployment name. Now as I am going to deploy this Chat Bot on a Demo Community Site, I have assign the Site Endpoint with that Community Site API name. (will discuss later on this).
⚡ Step 6: Snap-in Deployment Settings
After “Save” New Deployment, “Embedded Service Deployments” dashboard page appear where you can find List of Deployment Snap-ins including your new one.
Focus on your New created Snap-ins and at end of the row you can find a “Drop down icon” to “VIEW” the Snap-in.

In Deployment setting you will need to setup “Chat Setting” where you must select “Chat Deployment” and “Chat Button”. Click on “Edit” button in “Chat Setting” block, then Again click Top “Edit” button (Beside Deployment name), to do further set up.
☁️ NOTE: You can “Select” General Settings “Show queue position”, but make sure your chat button that you have created and selected here are queuing enabled.
* Deployment name “Help” is Chat (Live Agent) Deployment name.
* Button belongs Chat (Live Agents) that we have mention earlier. “Chat Agents” is the name of Button.


Now Click on “Save” to save the Chat Settings.
⚡ Step 7: Add channel

Now Go to Einstein Bot builder and click on “Overview” on Top left side window (By default ‘Dialogs’ selected), then click “Add” channels.

Here you select the Channel as “Chat” and Select the button “Chat Agents” as deployment execution trigger.
“Activate” the Chat Bot where you can have the option to select “Snap-ins” and after clicking on “Submit” button you will be able to see “Chat with Expert” button.
You can click on “Chat with Expert” button if you can’t resist with the excitement to view the effects!!! No Issue you can also click to investigate chat window on Admin Site.
⚡ Step 8: Test with Chat (Live Agent)
Now again go to “Embedded Service Deployment Settings” section:
Setup→Feature Setting→Service→ Embedded Service (Formerly Snap-ins) → Embedded Service Deployment
Focus on your Created “Embedded Service Deployments” item and click “View” at end of the Row. Its opens the “Embedded Service Deployment Settings” page.

At the bottom of this page you can find “Embedded Service Code Snippets” section. Click on “Get Code” at right corner. A new window “Embedded Service Code Snippets” will appear where you can find “Chat Code Snippet” script.

You just need to copy and paste the code in the above picture, into html page before where you have added Chat script (live agent). You can also use it in your public community site also or any other site as per your business need.
I have added that script in a Testing Community Site for Demo purpose.
⚡ Step 9: Implementation Steps in Community Site:
Setup→ Feature Settings→ Communities
Click on “All Communities”, Create your “New Community” → Can Choose a Template (in this time I choose 'Customer Service') → “Get Started” → Enter a Name, URL, it will open your Work space → Click on “Builder” to land on Community Building Platform.
Click on Lightning icon (Components), from drop list, Drag “Embedded Service Chat” item under the menu “SUPPORT” and Drop in any suitable place on page/form.

You can see now in Bottom Right corner of the page! your Created Chat Button is appear! Click on it and put some basic information properties. Put Chat Deployment that you have created before.

NOW, ALL DONE !!!
Look at Top-Left corner, you can find a “Box” Builder icon beside “Home”, Click on it and View your community on Browser.

Now Chat with BOT as you are a Customer / Client Dialogs, at the end select bot response Dialog "Raise an Order Related Ticket?”as Customer reply. (Hope you remember that this Dialog linked with an APEX Action to create a CASE).
Lets check the case is created or not!
[ This Demo VIDEO is in SLOW MOTION mode]

💦Summary
So to sum everything up, Einstein bots have somewhat of a low skill floor but a high skill ceiling, meaning they are fairly easy to get into and start building but are hard to master and can be designed to do some very complex processes. Focus on delivering what your customers are asking for or having the most problems with, and build on that as you and your bot learn more about their needs. Use dialog to set the flow of the conversation, variables to store the data your bot needs, intents to train your bot to understand what your customers are saying, and entities to safeguard against bad data.
Comentarios